Phase 0 - Hardware Build
Phase 0 - Hardware Build 🛠️
Before a single line of configuration was written, there was a machine to build. This page documents the hardware decisions behind the AlphaLab server - what was chosen, why, and how it all came together.
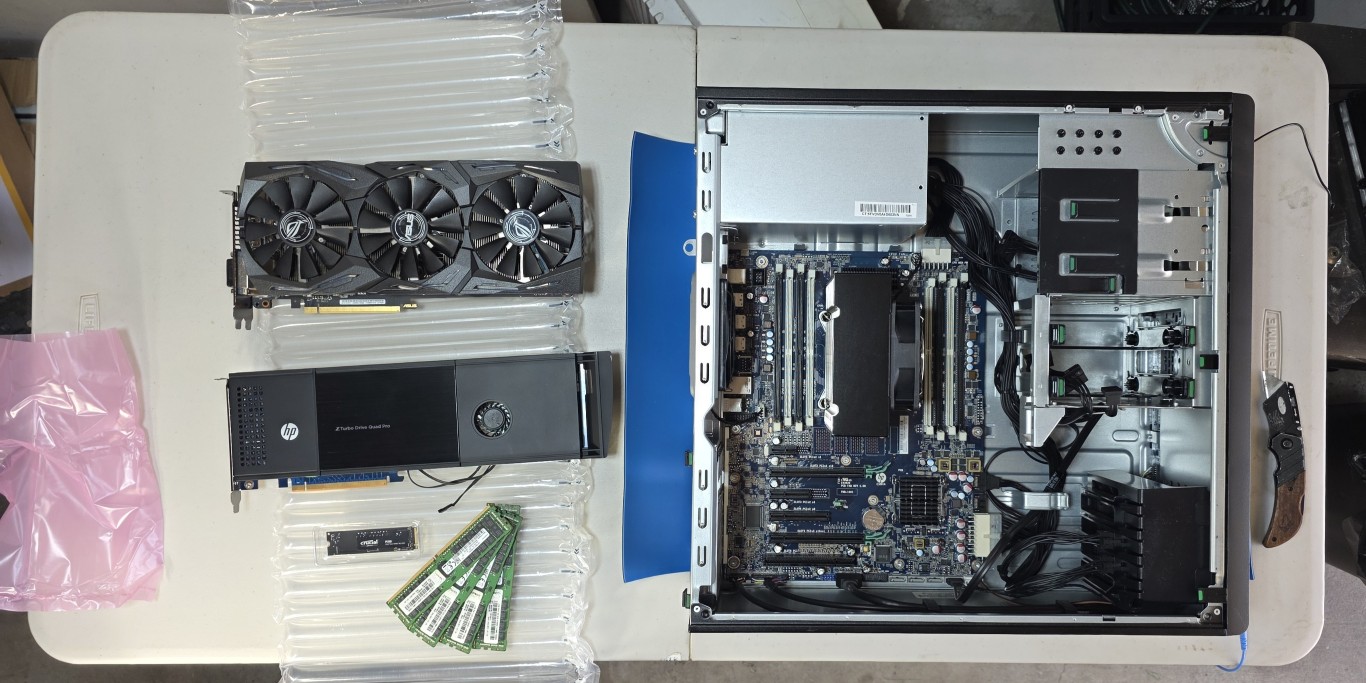
All Components - Pre-Build
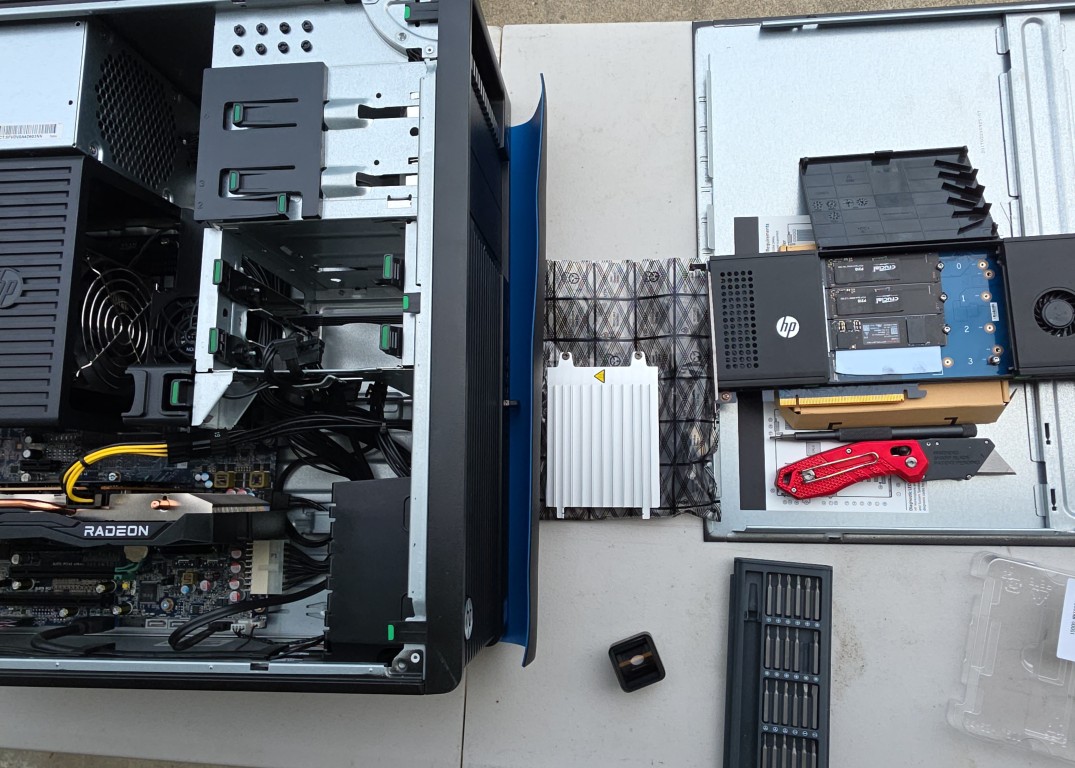
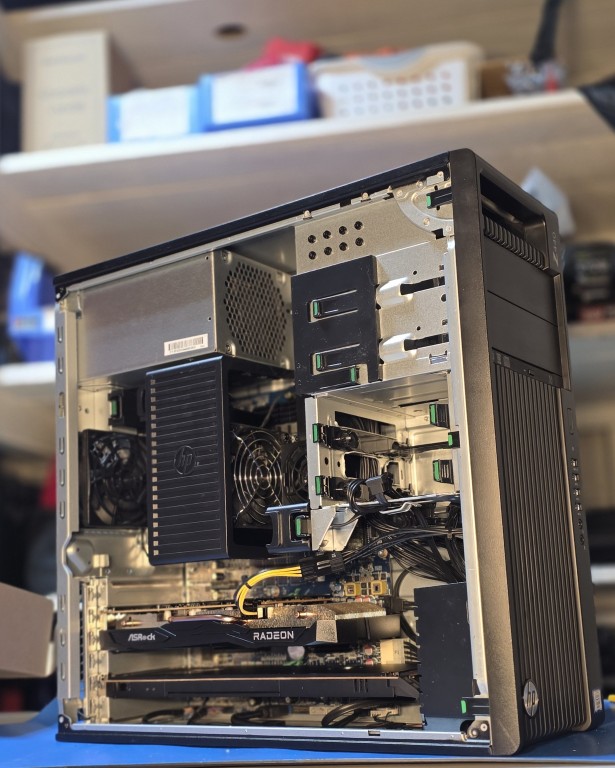
Before anything was installed, all components were laid out to verify everything was accounted for. The Z440 chassis is open on the right, with the GPU, NVMe adapter, SSDs, and ECC RAM sticks staged and ready on the left.
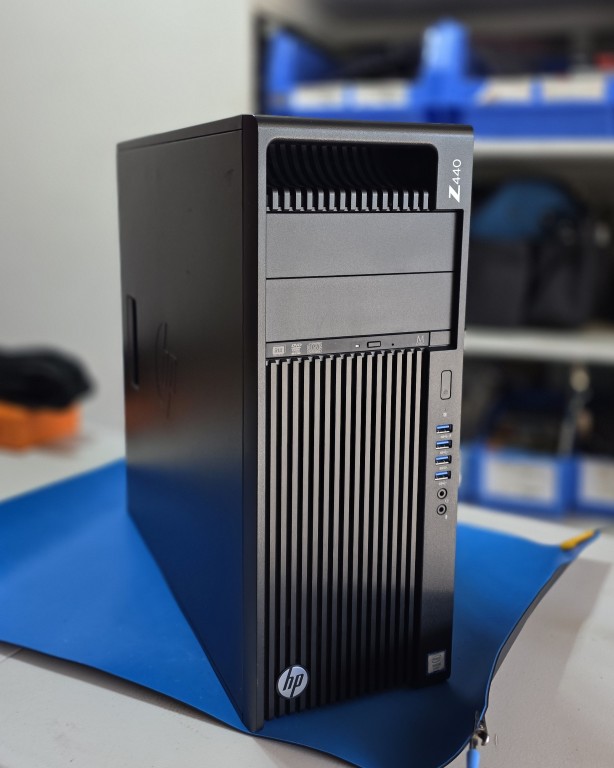
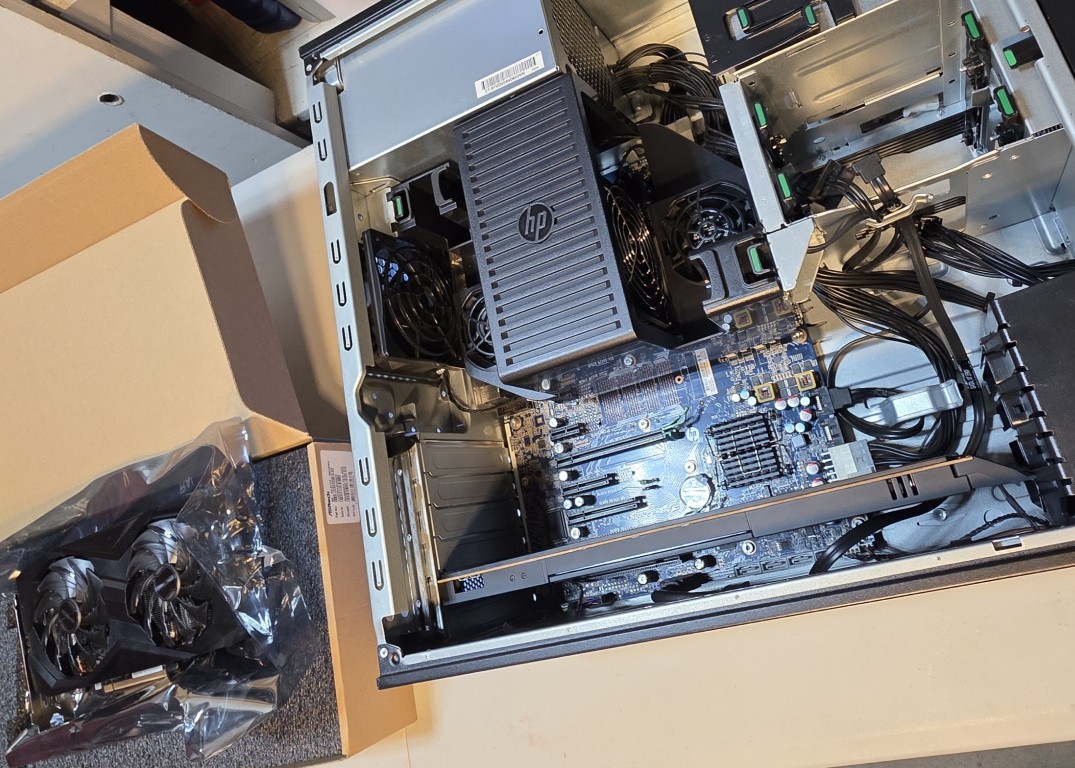
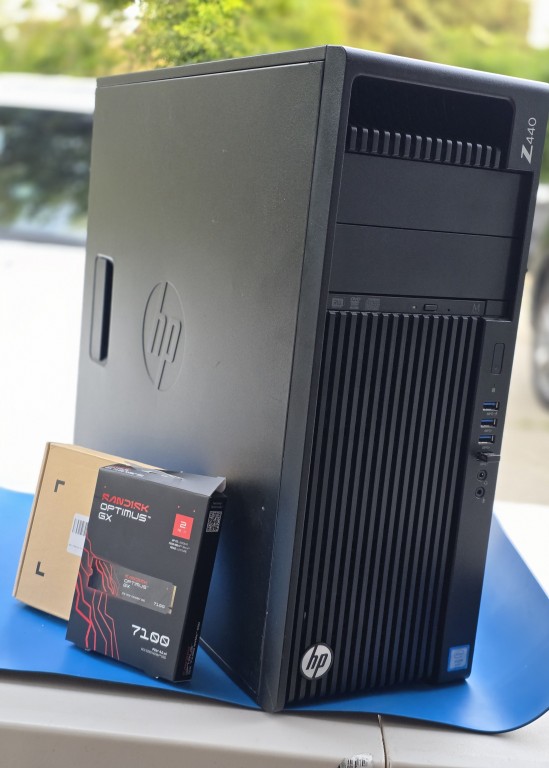
The Base Machine - HP Z440 Workstation
The foundation of the lab is an HP Z440 Workstation, sourced refurbished from PC Server & Parts. The Z440 is a professional-grade workstation platform originally designed for CAD, engineering, and media production workloads which makes it an ideal candidate for a home lab server. It has enterprise-class ECC memory support, PCIe expansion, and a tool-less chassis designed for frequent hardware changes.
The refurbished unit arrived with the following base components:
| Component | Spec |
|---|---|
| CPU | Intel Xeon E5-2690 v4 2.6GHz / 3.5GHz Turbo |
| Cores | 14 cores / 28 threads |
| Memory Cooler | HP factory memory cooler (included) |
| Optical Drive | DVD-RW |
| PSU | 700W HP Z440 PSU |
CPU Selection - Why the E5-2690 v4
The Xeon E5-2690 v4 was a deliberate choice after comparing the Xeon v4 lineup carefully. The goal was the best balance between core count and clock speed for running multiple simultaneous virtual machines.
More cores means more VMs running in parallel without fighting over resources. But clock speed still matters - lower-clocked CPUs feel sluggish on tasks that cannot be parallelized. The 2690 v4 hits the sweet spot: 14 cores / 28 threads at 2.6GHz base with 3.5GHz turbo gives enough raw thread count for a full lab stack while maintaining responsive single-thread performance.
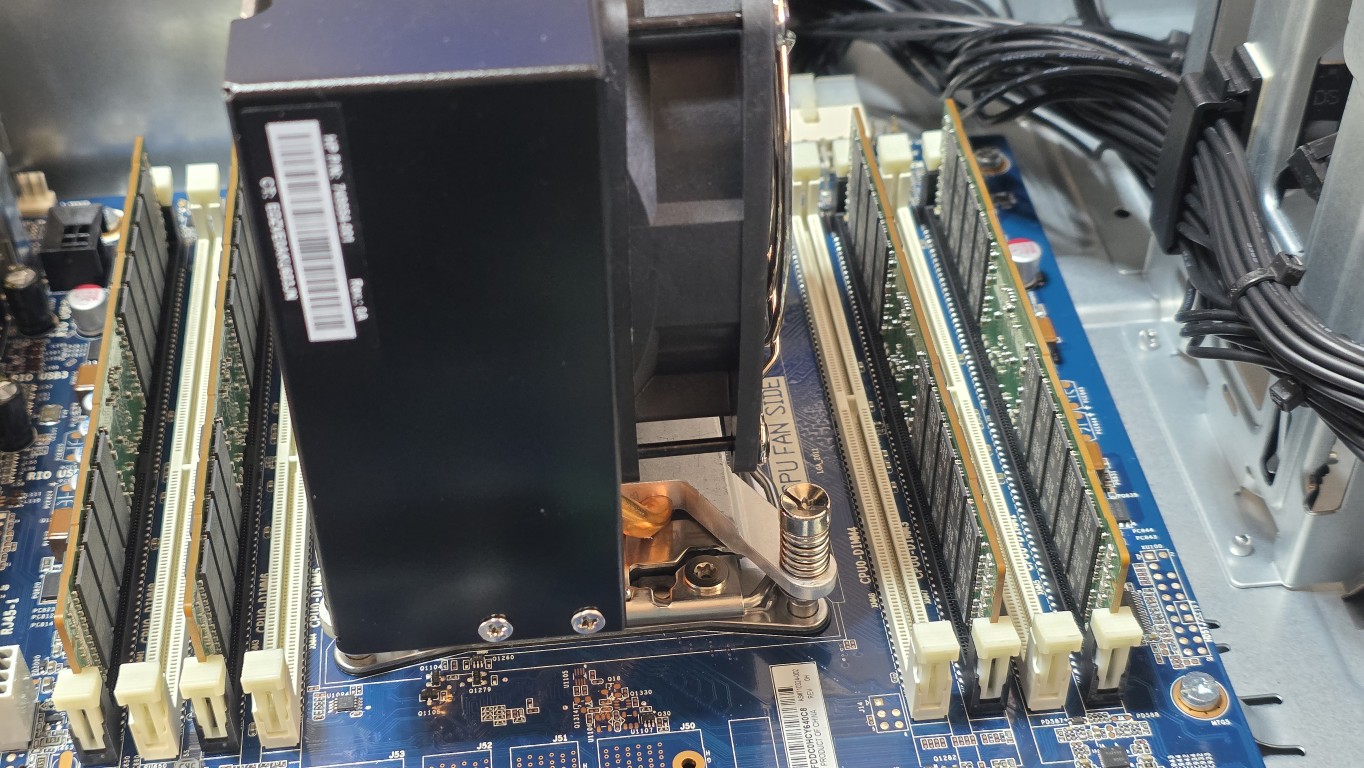
Memory - 64GB ECC
Four sticks of 16GB 2Rx4 2400MHz DDR4 ECC server memory were installed, sourced from Dell PowerEdge server pulls. Total: 64GB.
A few deliberate decisions here:
Why ECC? Error-Correcting Code memory detects and corrects single-bit memory errors in real time. For a server running continuously with multiple VMs, ECC prevents the kind of silent data corruption that can cause mysterious crashes and filesystem issues. It is standard in enterprise gear for a reason.
Why 2400MHz? The E5-2690 v4 has a maximum supported memory speed of 2400MHz therefore 2400MHz sticks were sourced specifically to run at the CPU’s rated maximum. Faster sticks would simply downclock to 2400MHz, so there is no benefit to going higher.
Why four sticks instead of eight? The Z440 ships with an HP memory cooler that is required whenever more than four DIMMs are populated. The unit was specifically sourced with this cooler already installed which means there is headroom to expand to 128GB later simply by adding four more sticks, without any additional hardware required. For now, the four 16GB DDR4 RAM sticks should be plenty for what I am planning to do with this machine.
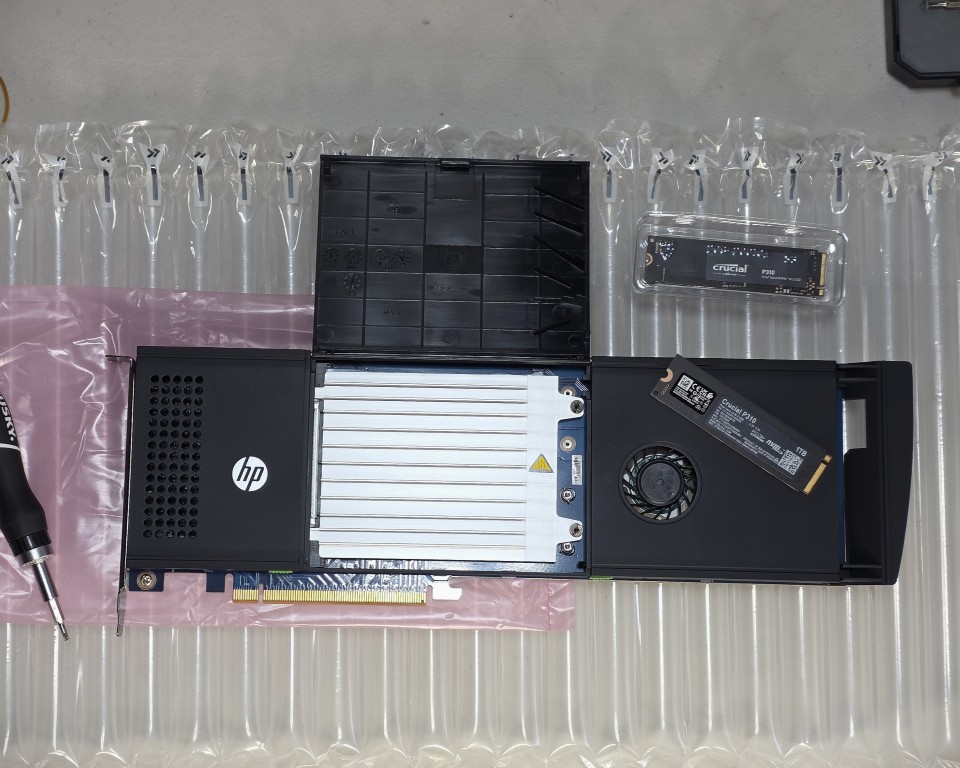
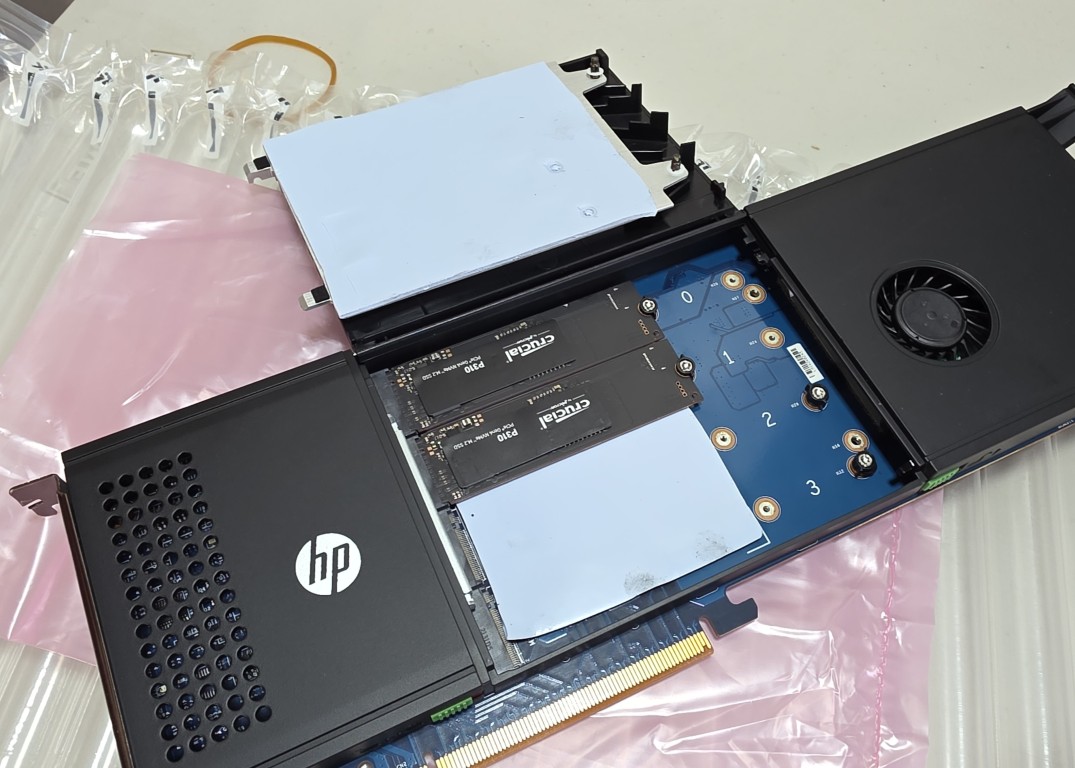
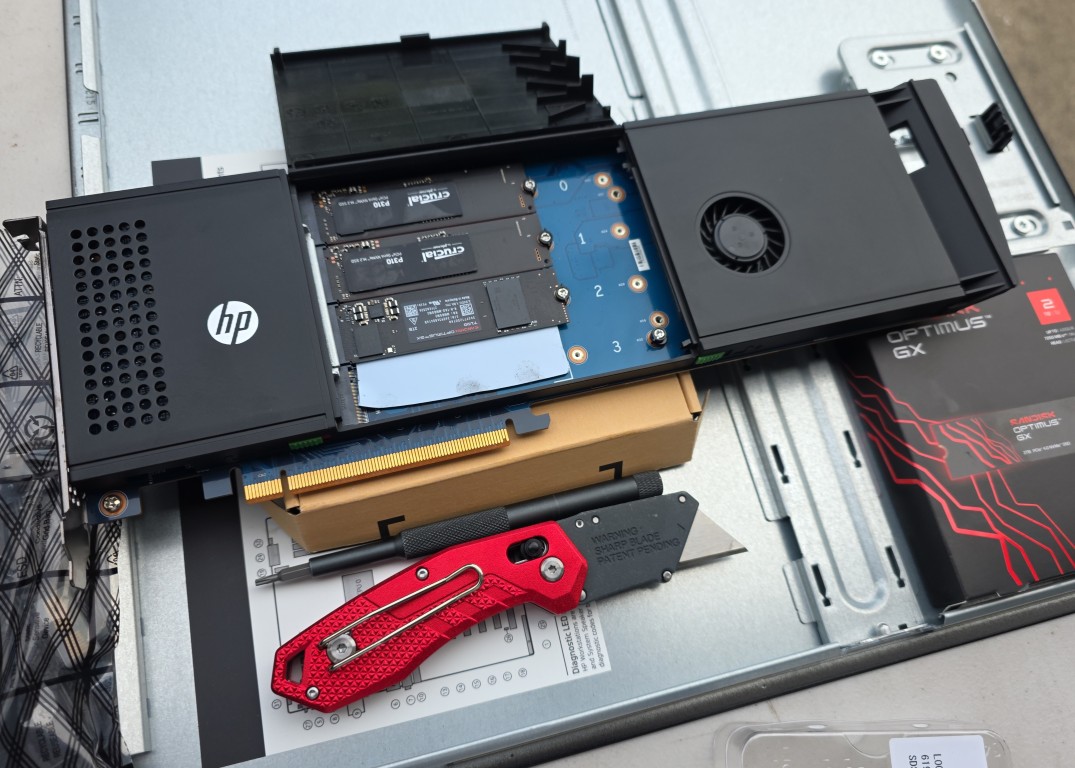
Storage - HP Z Turbo Drive Quad Pro NVMe Adapter
Rather than using traditional SATA SSDs or HDDs, storage is handled by an HP Z Turbo Drive Quad Pro PCIe NVMe Adapter - a PCIe x16 card that accepts up to four M.2 NVMe SSDs simultaneously. This approach was chosen for several reasons:
- NVMe is significantly faster than SATA SSD for both sequential and random I/O
- The quad adapter keeps all storage on a single PCIe card, preserving other slots
- M.2 drives are compact and generate less heat than 3.5" HDDs
- The adapter currently has one slot remaining for future expansion
Current drives installed:
| Drive | Capacity | Purpose |
|---|---|---|
| Crucial P310 NVMe M.2 | 500GB | Proxmox OS + active VMs |
| Crucial P310 NVMe M.2 | 1TB | Bare metal Windows 10 (video/photo editing) |
| SanDisk Optimus GX7100 NVMe M.2 | 2TB | Bulk storage / future TrueNAS |
The 2TB SanDisk was added more recently and deserves a special mention. It was acquired at a price close to pre-AI-boom levels - a lucky find in a market where storage and memory prices have climbed sharply since the AI explosion drove demand for high-capacity drives. In hindsight, buying more storage and memory earlier would have been the right call but hindsight is always 20/20.
GPU - From GTX 1070 Ti to RX 6600 XT
The GPU selection went through one revision before landing on the final choice.
First Attempt - ASUS ROG Strix GTX 1070 Ti
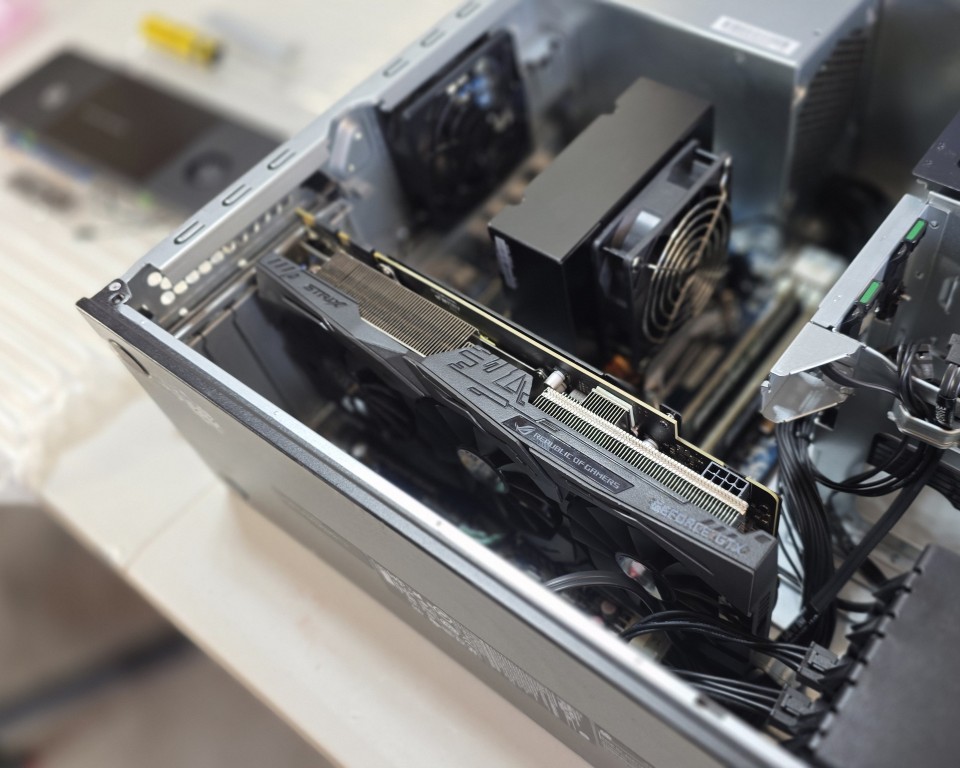
The initial plan was to repurpose an ASUS ROG Strix GeForce GTX 1070 Ti 8GB that was already on hand. Installing it required sourcing a female 6-pin to male 8-pin GPU power adapter cable, as the Z440’s PSU uses the older 6-pin connector standard.
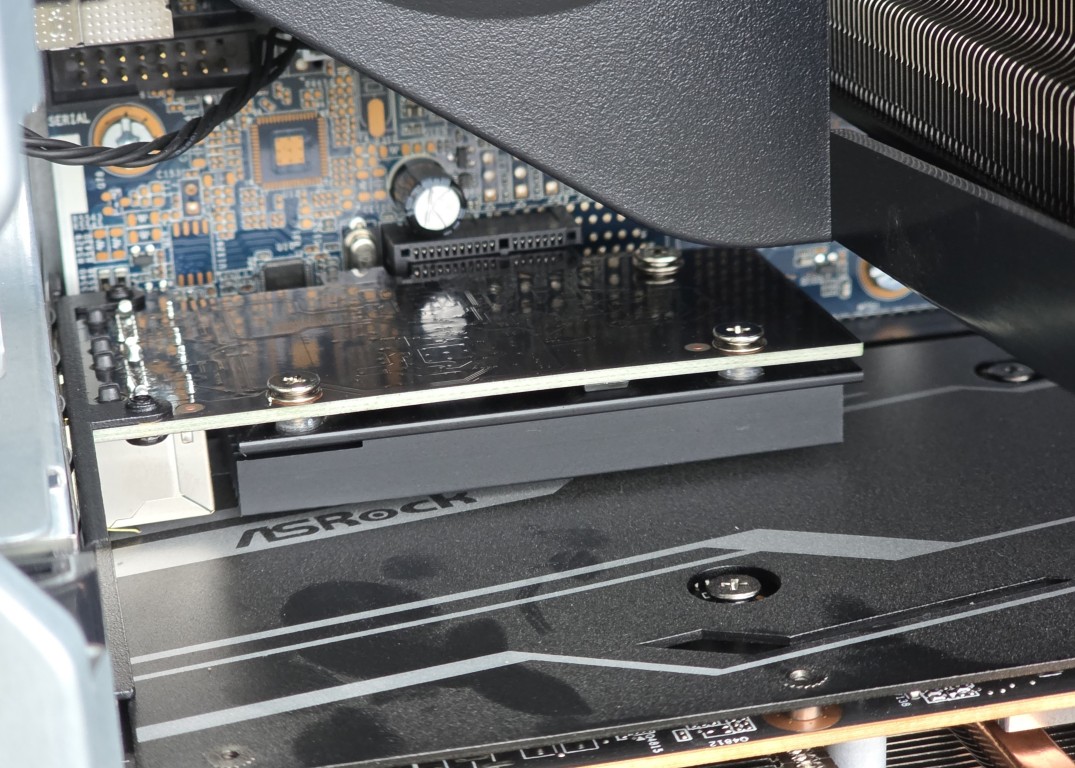
The card installed successfully and functioned correctly but it was simply too physically large for this build. With the HP Z Turbo Quad Pro SSD adapter occupying the adjacent PCIe slot, the 1070 Ti’s triple-fan shroud left almost no clearance. Thermals and airflow would have been a long-term concern.
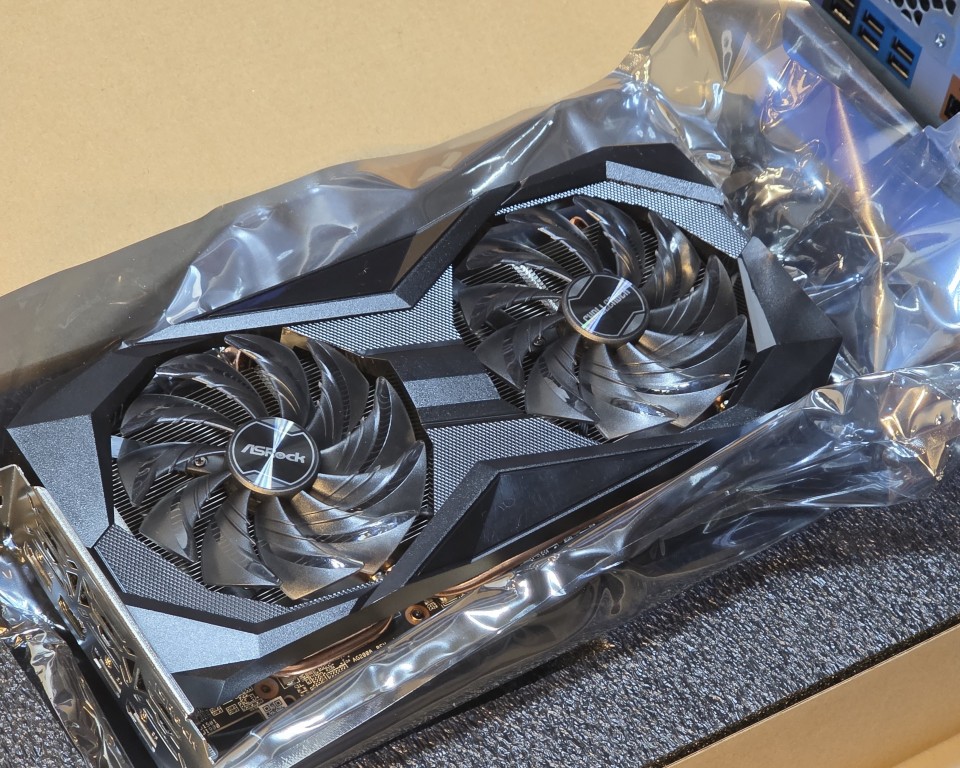
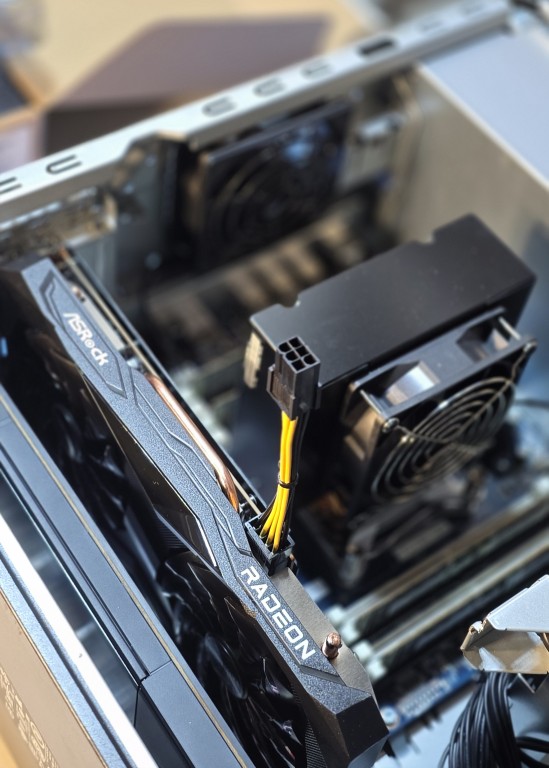
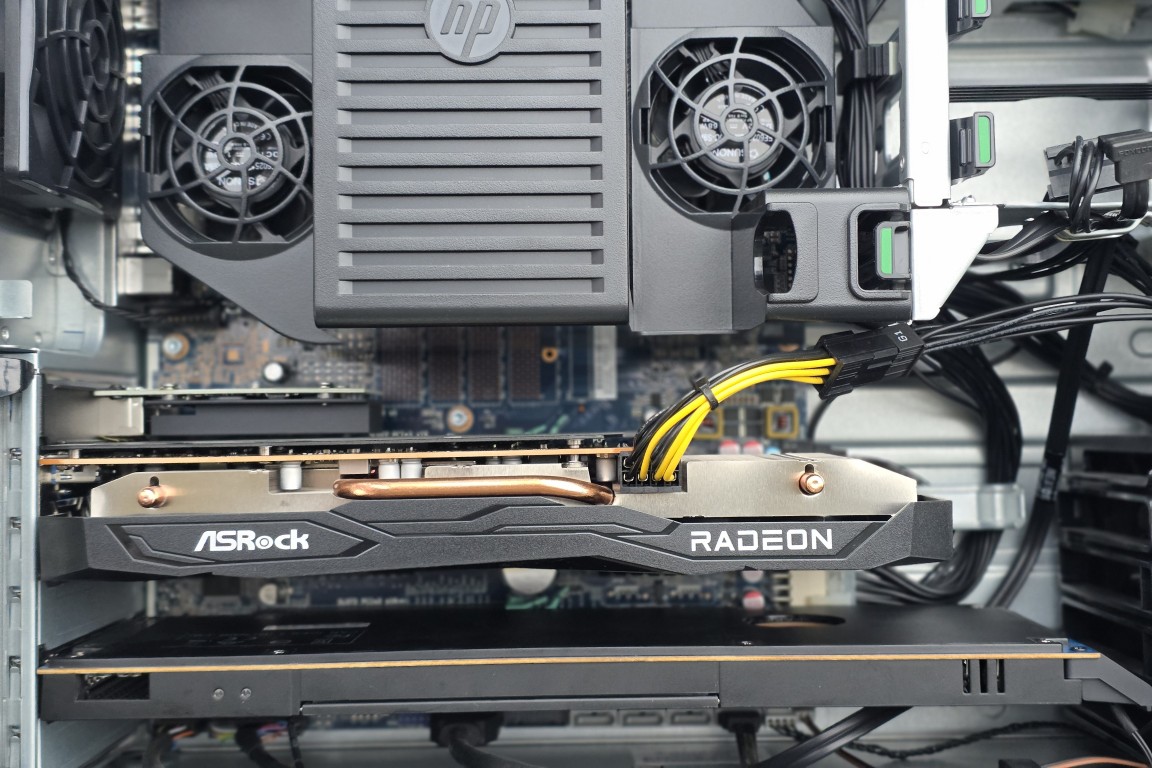
Final Choice - ASRock Challenger D RX 6600 XT 8GB
The replacement was an ASRock Challenger D Radeon RX 6600 XT 8GB GDDR6, sourced as an open-box deal through Newegg.
The key advantages over the 1070 Ti for this build:
- Dual-fan design instead of triple-fan - physically shorter, fits cleanly next to the Z Turbo adapter with proper clearance
- GDDR6 memory newer, faster, and more efficient than the GDDR5 on the 1070 Ti
- Better compute performance per watt relevant for future AI/ML workloads on this machine
- The open-box price made it a solid value
The RX 6600 XT is currently reserved for future AI and machine learning workloads as the lab evolves toward the AI specialization track.
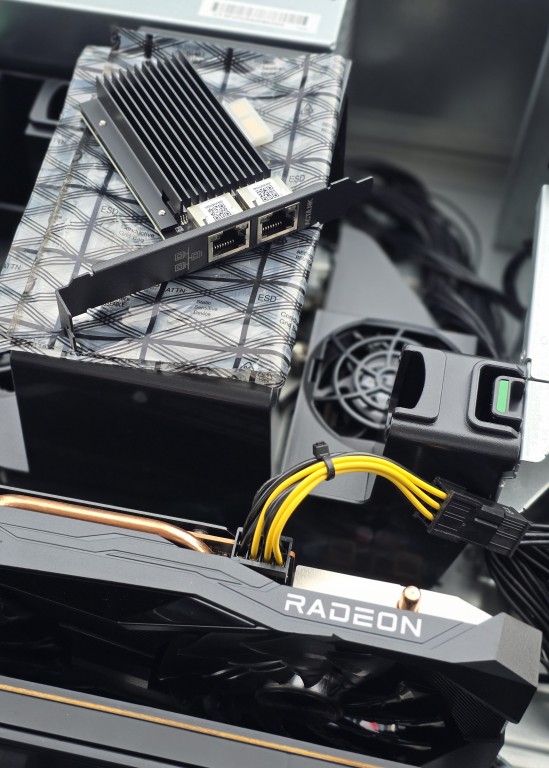
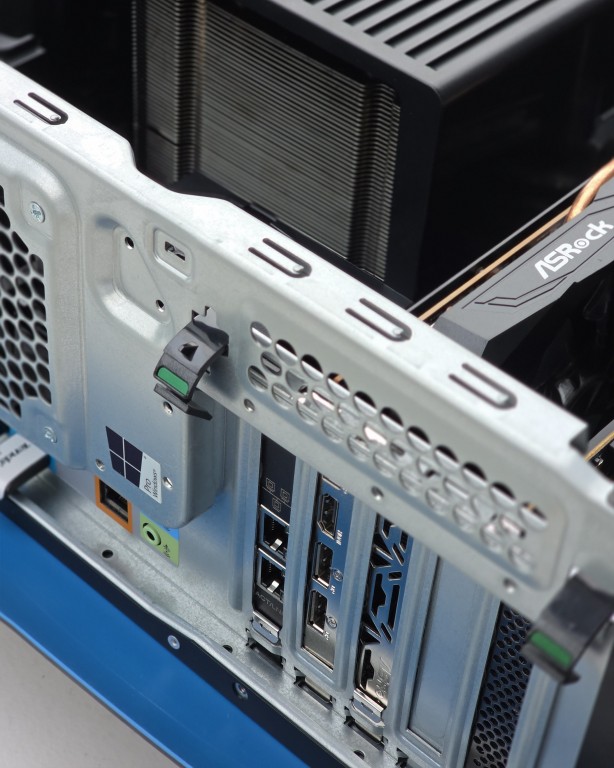
Network Upgrade - Intel I226-V Dual Port NIC
During the Proxmox lab setup phase, a 2.5GBase-T Intel I226-V Dual Port PCIe NIC was installed. This was necessary to give OPNsense a dedicated physical WAN interface separate from the onboard NIC used for Proxmox management - resolving an ARP conflict that prevented OPNsense from getting a DHCP lease.
Full details on why this was needed are covered in Phase 2 - Network Configuration.
Current Full Hardware Spec
| Component | Detail |
|---|---|
| Platform | HP Z440 Workstation |
| CPU | Intel Xeon E5-2690 v4 (14c / 28t, 2.6GHz / 3.5GHz) |
| RAM | 64GB DDR4 ECC 2400MHz (4x 16GB) |
| Memory Cooler | HP Z440 factory memory cooler |
| Storage Adapter | HP Z Turbo Drive Quad Pro (PCIe x16) |
| Drive 1 | Crucial P310 500GB NVMe M.2 |
| Drive 2 | Crucial P310 1TB NVMe M.2 |
| Drive 3 | SanDisk Optimus GX7100 2TB NVMe M.2 |
| Drive 4 | Empty slot (future expansion) |
| GPU | ASRock Challenger D RX 6600 XT 8GB GDDR6 |
| NIC 1 | Onboard Intel (eno1) - Proxmox management |
| NIC 2 | Intel I226-V Dual Port PCIe (enp12s0 / enp13s0) |
| Optical | DVD-RW |
| PSU | 700W HP Z440 |
| Chassis | HP Z440 Tower |
Planned Future Upgrades
| Upgrade | Notes |
|---|---|
| 4th NVMe SSD | One slot remaining in Z Turbo Quad adapter |
| High-capacity NAS HDD | Set up RAID configuration for archive storage – waiting for prices to normalize |
| 80mm Fan Adapter | Replaces 5.25" bay cover for additional chassis airflow |
What I Learned
- Workstation-class hardware (Z440, Z series Xeon) hits a sweet spot for home lab use with enterprise features like ECC memory and PCIe expansion at a fraction of server rack costs
- Sourcing refurbished enterprise hardware from reputable resellers is a cost-effective way to get professional-grade components
- PSU wattage matters when planning GPU additions - the 700W PSU was a deliberate requirement before the machine was even purchased
- Physical fitment is a real constraint - the GTX 1070 Ti technically worked but was not the right card for this chassis configuration
- Planning for expandability (memory cooler, empty NVMe slot, second NIC port) pays off when the lab grows